 |
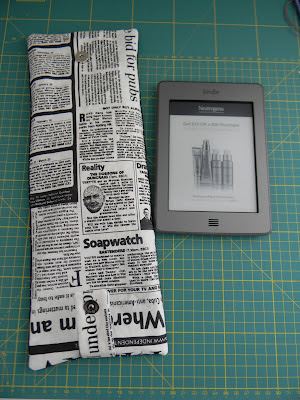
| Bolsa para Kindle Foto: @Koio-Ko-Fi |
For some time now I do not publish anything. The truth is that I have been working on long projects and complicated (quilts). Today I decided to put the quilts away and make a simple and useful project. Here I leave you a Kindle pocket tutorial.
Materiais:
- Tecido exterior (5 1/2" x 14 1/2")
- Forro (5 1/2" x 14 1/2")
- Enchimento (5 1/2" x 14 1/2")
- Tira para fecho (7 1/2" x 1 1/2")
- Fecho magnético
Materials:
- Outer fabric (5 1/2 "x 14 1/2")
- Lining (5 1/2 "x 14 1/2")
- Volume Interfacing (5 1/2 "x 14 1/2")
- Strap closure (7 1/2 "x 1 1/2")
- Magnetic closure
1- Cortar tecido exterior, forro e enchimento com as medidas indicadas.
1 - Cut outer fabric, lining and volume interfacing with the measures indicated.
 |
| Foto: Koio-Ko-Fi |
2 - O enchimento que utilizei é termocolante (Vilena H640 7 Fliselina H640). Neste caso deverá colocar-se a parte colante do enchimento com o avesso do tecido exterior e passar a ferro que que a mesma cole ao tecido. Caso não utilize enchimento termocolante passe à fase seguinte.
2 - The fusible interfacing that I used is (Fliselina H640 Vilena H640). In this case you should put the sticky part of the filling with the wrong side of the outer fabric and iron it. If you do not use fusible interfacing pass to the next stage.
 |
| Enchimento termocolante (Vilena H640 / Fliselina H640) Foto: @Koio-Ko-Fi |
 |
| Foto: @Koio-Ko-Fi |
3 - Fazer a tira do fecho. Cortar um pedaço do tecido exterior com as medidas 7 1/2" x 1 1/2". Juntar o direito do tecido, dobrar ao meio e centrar o fecho magnético. Coser à volta deixando uma abertura no topo.
3 - Making the strip closure. Cut a piece of outer fabric with the measures 7 1/2 "x 1 1/2". Add the right fabric together, fold in half and center the magnetic closure. Sewing around leaving an opening at the top.
 |
| Foto: @Koio-Ko-Fi |
4 - Put the rights sides of the outer fabric and lining together and overlap the interfacing (if you have not used the fusible interfacing ). In one end place of the closure strip and in the other end center the other part of magnetic closure.
 |
| Foto: @Koio-Ko-Fi |
5- Coser a toda à volta deixando apenas uma abertura para virar do direito.
5 - Sew all around leaving only an opening to turn right.
 |
| Foto: @Koio-Ko-Fi |
6 - Virar do direito. Coser a abertura deixada. Coser as laterais com ponto cobertor.
6 - Turn right. Sew the opening left. Sew the sides with manual running-stitch.
 |
| Foto: @Koio-Ko-Fi |
 |
| Foto: @Koio-Ko-Fi |
 |
| Foto: @Koio-Ko-Fi |

Sem comentários:
Enviar um comentário